


When planning a move, organizing your belongings properly can make the difference between a smooth transition and a stressful one. However, organizing plants for relocation is not a very easy task. While hiring a Toronto moving company can help with most of the heavy lifting, there are some items movers typically won’t handle, and plants are sometimes it. Due to their fragile and perishable nature, most companies exclude plants from their packing services. If you’re relocating and want to bring your leafy companions with you, keep reading for practical tips on how to prepare, pack, and protect your plants. With the right steps and reliable help you can ensure your green friends arrive safe and healthy.
Why organizing plants for relocation deserves special planning
Plants are fragile and can suffer from shock, damage, or dehydration during a move. They need light, stable temperatures, and gentle handling. Organizing plants for relocation requires more care than packing regular household items. Most moving companies avoid transporting plants due to their delicate condition. This makes relocating plants your responsibility during the move. Without planning ahead, your plants may not survive the journey.

Here’s why early preparation is important:
-
Some provinces restrict which plants you can bring
-
Plants may need repotting and pruning weeks in advance
-
Environmental changes during transit can harm plant health
-
Specific materials are needed to pack plants safely
-
Most movers do not include plants in their standard services
Planning ahead, even if it’s a last-minute move helps keep your plants safe and healthy throughout the move.
Understanding the legal and moving company restrictions
Before organizing plants for relocation, check the laws in your new province. Some regions do not allow you to bring in outside plants. These rules protect local agriculture from pests, diseases, and invasive species. Trying to cross provincial borders with restricted plants can result in inspections or fines. Always confirm the latest regulations online or by contacting your destination’s agricultural office. If you’re moving within the same province, rules are usually more relaxed. Even so, it’s still a good idea to check for any local guidelines.
In addition to legal rules, consider your moving company’s policies. Many movers avoid transporting plants due to their fragile and perishable nature. Some companies may allow you to include plants, but they often do not cover damage. Others may refuse them entirely. This is why planning ahead is essential when relocating plants. Contact your chosen mover early and ask about their specific rules. If they don’t handle plants, you may need to move them yourself or find a specialized service. Clear communication with your moving company can prevent last-minute surprises.
Are you allowed to relocate plants to your new province?
Before organizing plants for relocation, check the rules in your new province. Some plants are restricted to prevent the spread of pests and diseases. If you’re organizing a move to the United States, the rules are even stricter. Many plants are banned or need permits.

What to check before moving plants:
-
Does your new province allow the type of plant?
-
Are there rules about soil or outdoor plants?
-
Are your plants pest-free and disease-free?
-
Is the soil sterile and commercially packaged (for U.S. moves)?
-
Are citrus, cactus, or fruit trees restricted?
Check with your provincial government or U.S. customs in advance. This helps you avoid fines, delays, or losing your plants.
Gathering the right materials for moving plants
Once you’ve confirmed your plants can travel with you, start organizing plants for relocation by collecting the right supplies. Packing paper is essential, but you can also use old newspapers as a budget-friendly alternative. To reduce waste, consider biodegradable materials or reusable cloth wraps. Label each container with the plant’s name and any handling instructions. This helps avoid confusion during the move.
Keep in mind, for long distance moving it’s advisable to hire a reliable mover. Choose a company that understands how to protect fragile items like plants. This can reduce stress and help your leafy friends arrive safely.
Essential packing supplies you’ll need
Packing your plants properly is a key step in organizing plants for move. Without the right materials, plants can shift, spill, or suffer damage during the move. Whether you’re driving them yourself or using a moving service, good packing reduces stress on both you and your plants. It also helps them recover faster once they arrive at your new home. For example, plastic pots are ideal for moving since they’re lighter and less likely to break than ceramic ones. Each plant should have its own pot to avoid root damage. Secure the pots in containers to prevent spills and movement.
Basic supplies for relocating plants:
-
Plastic pots (one per plant)
-
Packing paper or old newspapers
-
Bubble wrap or soft cloth for padding
-
Sturdy containers or boxes
-
Labels for plant names and care notes
-
Eco-friendly wraps or compostable packing options
Preparing your plants in the weeks leading up to moving day
Getting your plants ready early is essential when organizing plants for relocation. Start preparing at least three weeks before your move to reduce the risk of shock or damage. This gives your plants time to adjust and strengthens them for the journey.
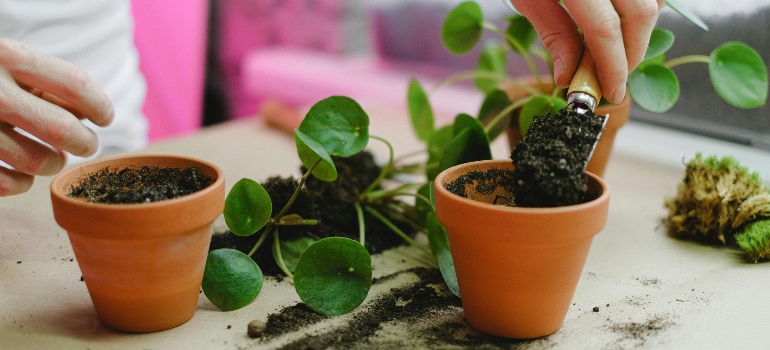
Three weeks before the big day, take the plants out of their usual pots and place them in plastic ones. Make sure this process is sterile to avoid introducing bacteria or pests. During this time, start adjusting your plants to the conditions they’ll experience during the move. For example, reduce watering slightly and place them in less light if they’ll be in a dark vehicle.
About a week before the move, prune any dead or excess leaves and check for signs of pests. If any plants seem unhealthy, quarantine them to prevent spreading pests or diseases to others. Having the right packing & moving supplies ready at this stage also helps. Prepare plastic pots, containers, and labeling materials ahead of time so you’re not scrambling at the last minute.
Early care and planning will help your plants arrive healthy and ready to thrive in their new home.
Moving day tips to protect and transport your plants
When relocating plants, how you handle them on moving day can greatly affect their condition upon arrival. Proper packing, ventilation, and temperature control are key to keeping your plants healthy during transit.
Follow these tips to protect your plants on moving day:
-
Wrap plants in bubble wrap or soft cloth to protect fragile stems and leaves
-
Place each pot in a sturdy container to prevent tipping and soil spillage
-
Fill empty space in boxes with extra pots, towels, or packing paper to reduce movement
-
For small plants inside closed boxes, punch air holes to allow ventilation
-
Keep plants in the vehicle cabin, not the trunk, to avoid extreme temperatures
-
Position plants away from direct sunlight, heat vents, or cold drafts
-
If stopping overnight, bring plants indoors or crack a window for airflow
Taking the time to pack and place your plants correctly helps them survive the journey and settle in more easily once you arrive.
Keeping plants safe and secure in transit with the right materials
When relocating plants, even a short drive can damage them if they aren’t packed properly. The right materials help keep your plants stable, clean, and protected during the journey.
Use soft wraps like bubble wrap, cloth, or old towels to cushion leaves and stems. Always leave enough space for airflow—plants need to breathe even when boxed. Place each pot in a sturdy container or box to prevent tipping. Fill gaps with soft packing material to stop movement and soil spillage.
Despite your best efforts, moving plants often leaves behind a mess such as loose soil, broken leaves, or spills. Be ready with essential tools and cleaning equipment to tidy up after unpacking. A handheld vacuum, a soft brush, and a damp cloth can make cleanup easier and protect your new space.
Transit tips at a glance
Refer to the best tips for moving your plants:
-
Use light wraps to cushion branches and leaves
-
Allow airflow by not sealing containers tightly
-
Secure pots in boxes or crates with padding
-
Label each plant for easy unpacking
-
Keep cleaning tools handy for quick post-move cleanup
A little preparation goes a long way in keeping your plants safe and your new home clean.
Settling your plants into their new home
After relocating plants, give them time to adjust to their new environment. Start by gently reintroducing them to their original or decorative pots using fresh, clean soil. Avoid fertilizing right away, as stressed plants need time to recover. Water them lightly to rehydrate the roots, but don’t overdo it. Monitor each plant for signs of shock, such as drooping leaves or discoloration. Gradually increase their light exposure, especially if they were boxed for a long-distance move. Place them in a quiet, stable spot to help them acclimate. With proper care, your plants will bounce back and thrive in their new space.

How to help plants adjust after the move
The first 24 to 48 hours after relocating plants are crucial. Look for signs of stress like wilting, yellowing leaves, or dry soil. Rehydrate your plants gently with room-temperature water and avoid placing them in direct sunlight too soon. Slowly increase their light exposure over several days to prevent shock, especially after a long-distance move.
If you can’t settle your plants into their final space immediately, consider long-term and short-term storage options. For short-term storage, place them in a cool, shaded, and well-ventilated area indoors. Check soil moisture daily and keep them away from heating or cooling vents. For long-term storage, use a climate-controlled space with indirect light, stable temperatures, and good airflow. Whether you’re unpacking right away or storing them temporarily, regular care and attention will help your plants adjust and stay healthy in their new environment.
Final thoughts on organizing plants for relocation
Relocating plants takes more than just packing them in boxes, it requires careful planning, the right materials, and ongoing care. By following the steps for organizing plants for relocation, you can protect your leafy companions from damage and stress. Whether you’re moving locally or across provinces, early preparation and proper transport methods make all the difference. Don’t forget to consider storage solutions if immediate setup isn’t possible. With the right approach, your plants will not only survive the move but thrive in their new home. Treat them with care, and they’ll continue to grow happily by your side.


